


How To Make a Mop Fly – Step by Step Guide
 How To Make a Mop Fly – Step by Step Guide
gearweare.net
How To Make a Mop Fly – Step by Step Guide
gearweare.net
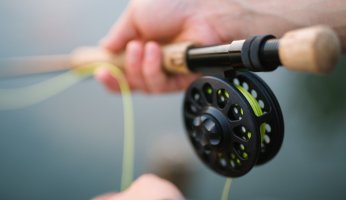
I have been fishing with spin cast equipment all of my life. A few years ago, I bought my first fly rod more from curiosity than anything else and I quickly became intrigued. One of the things that I found fascinating right from the start, and still do, is that in spite of its initial appearance, fly-fishing really is a minimalist sport. The only thing that is truly required in order to spend a day on the water is a handful of flies and a rod. All of the other equipment simply exists in order to make fly fishing easier.
Table of Contents
Spin cast fishing
Spin cast fishing is different. I am constantly going through my boat and setting aside tackle that I most likely won’t need, depending on my destination for the day. I’m certain you know what I’m talking about. Stuff just keeps piling up! As a child, all of my tackle fit into a one-tray tackle box and I never felt as if I wasn’t prepared to go fishing on a moment’s notice. Yet, as an adult, I struggle to find enough room for all of my gear in my boat and I still wonder if I have forgotten something.
This is the fascinating part of fly-fishing, at least for me. I can take every piece of fly fishing tackle that I own, on any trip, and it all fits in a vest. On any given day I have the tackle I need to fish for anything from musky to tiny, native, brook trout. Fly fisherman have figured out how to get it done with less. To be honest, coming from a spin cast background, there are not many flies that cannot be substituted for something else, so it’s easier to make do with less when fly fishing.
In fly-fishing
In fly-fishing, in case you’ve never done it, the spinner of the fly fishing world is the wooly bugger. Don’t know what you should be throwing today? Use a wooly bugger. Not sure of how big the fish are here? Throw a wooly bugger. Can’t get anything to bite? Throw a wooly bugger. The irony of a wooly bugger is, in a sport that tries so hard to mimic natural insects by using feathers and string, the wooly bugger doesn’t look like anything. Nothing natural anyway. The ongoing joke is that fish bite it because it’s so ugly.
How to fly fish
Learning to fly fish was one of the most educational things I could have done. I have no doubt that I am a better spin cast fisherman for it. I entered the sport later in life and, already being an avid fisherman, my only goal was to catch fish. I had no judgments or a preconceived idea concerning what is a “real” fly and what isn’t, as many people do who fly fish exclusively. For example, many orthodox fly fishermen refuse to use certain materials in making flies simply because they are not organic enough. They frown at using Styrofoam rubber to create a floating fly because Grandpa used to treat his fly with a floatant after every 5 casts. Besides, Styrofoam is a not chicken feather! You get my point. I don’t know what animal that they think the nylon string and metal hook comes from but that’s a different subject.
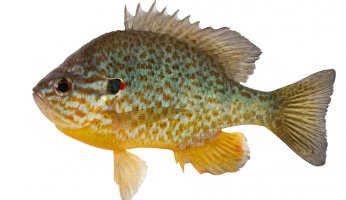
As recently as the last 3 or 4 years, there has been a new fly enter the world of fly-fishing that is driving the purists nuts. This time it’s not the woolly-bugger, which they’ve been forced to accept slowly. It’s the mop fly. The mop fly, in one word, is deadly. I’ve caught native steelhead, stocked trout and smallmouth bass on them. I don’t think that there is a fish alive that can resist chomping down on this thing. I don’t mean on cloudy days, after a full moon, and Venus is on the rise. I mean nearly ALL THE TIME! This thing is threatening to force worms to open up 401Ks for old age and retirement! There is something about the appearance and action of this material when it is in the water that makes it a marvel to behold.
Snipping and using the small synthetic nodules on the car sham-mittens or mops make the mop worm. You’ve seen these mitts material everywhere. They come in all different colors and sizes and you can buy them for $5.00 or less in most places. In its simplest form, this is tied to a hook with thread and it’s time to hit the water. Total cost is measured in pennies by the time you tie a dozen of them. Yet, despite its success, many fly fishermen see them as ‘dumbing down’ their sport and refuse to use them. That makes me believe that there are even fewer spin cast fishermen using them.
I have yet to see any commercial mop flies for bass. If you have a fly shop nearby, you might find some small ones that someone has made for fun but those don’t work for us, do they? We are not casting tiny, weightless bugs on a heavy, floating line. Spin cast fishermen need something substantial or not only will it not catch bass, it won’t even make it out of the boat. I’m going to demonstrate how easy it is to adapt this fly to bass fishing with a spin cast and how inexpensive it can be. If you’ve never tied a fly before, don’t be intimidated. It’s not hard, but there are a couple of pieces of equipment that you can pick up to make the job easier on you.
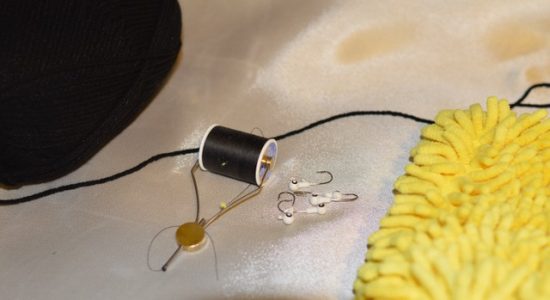
You will need some type of vice. This could be a bench vice or even a pair of needle-nose vice-grips. It simply serves to hold the hook in place while you tie. It will also be much easier if you get the thread bobbin that fly tiers use. You can get these for a few dollars online or probably a little more at a fly shop. That’s it for specialized equipment. Everything else you can get in one trip to a superstore.
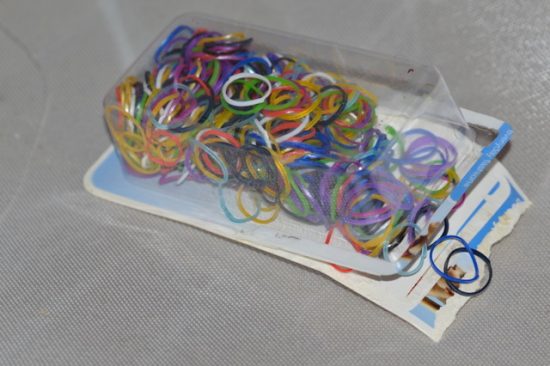
I like to use black thread but there is also a clear thread if you prefer (it looks like a very thin fishing line) but while it works with any color of materials that you might be tying, it breaks easily. Make sure that the thread you choose is not made of cotton and that you buy the thickest diameter on the shelf. You’ll also need a small tube of waterproof superglue to glue your thread down when you are finished. You can use any color of mop material that you want, but the most common and easy to find is bright yellow and it also seems to be the favorite color of the fish. Look in the automotive department of a store for the washing mitts. While you are shopping, pick up a ball of black, synthetic yarn. I say black but you can use whatever color you want. One last thing, just because they’re fun, also pick up a package of those small, round, hair bands that people use in their kid’s hair. They’ll come in all colors and sizes. These are our jig’s legs.
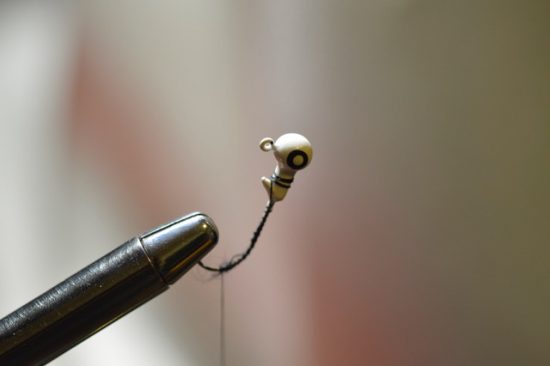
So let’s get started. Begin by placing a plain jig head in your vice. I like to use ⅛” or ¼” but you can use anything you want. Keep in mind though that the length of your mop ‘nodules’ will dictate the size of the jig. When you place your hook in your vice, make certain that the eyelet is facing up, as it would be when you tie it on your line. This is upside down in the world of fly tying for fly-fishermen but it’s nearly impossible to find straight jig heads anymore. See mine in photo #1.
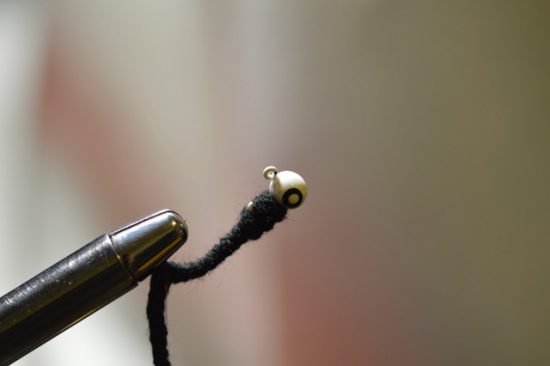
Next, start wrapping your thread from the front, under the head, and take it all of the way back to the hook bend. If you’re new to this, simply lay the tag end of the thread along the hook, and begin wrapping over the top of your thread as you move backward. If you end up with too much and you have a thread ‘tail’ sticking out, just snip it off. Once you get to the hook bend, cut off a section of your yarn that we’ll use to hide the hook and make a body, and wrap one end of the yarn with your thread to secure it there. This is photo #2.
![]()
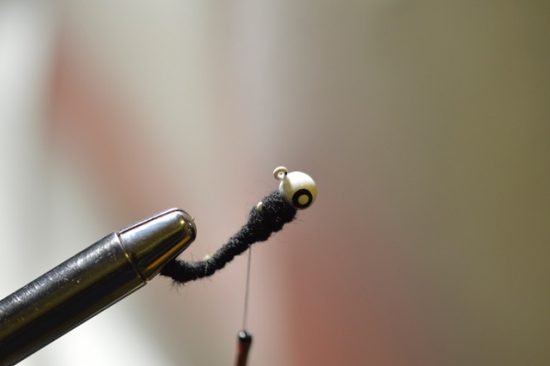
Drop the thread bobbin and let it hang there while you begin wrapping the yarn up the hook toward the head. Take it all the way up under the head and then overwrap it, going back to the bend in the hook where you started. In photo #3, I’ve come all the way back and now I wrap my thread around the hook bend a few times more to secure the yarn in place. Once that’s done, cut the rest of your yarn free from the hook.
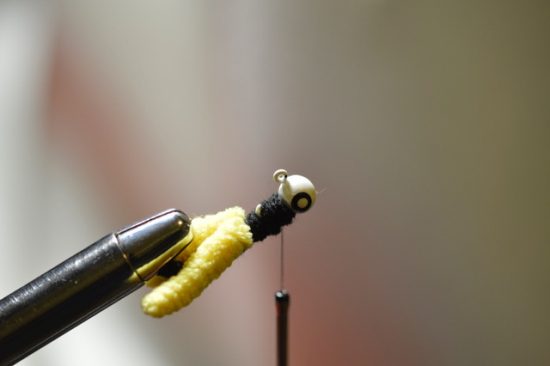
In photo #4, wrap your thread back towards the center, but stop just under the bait keeper under the jig head. Let your bobbin hang and clip off two nodules of mop material. Hold them together at the cut ends, as if they were one, and hold them on top of the hook above your thread wrapping point. Now wrap your thread over both of them at the same time, capturing enough of the material to affix the front of the nodules to the hook.
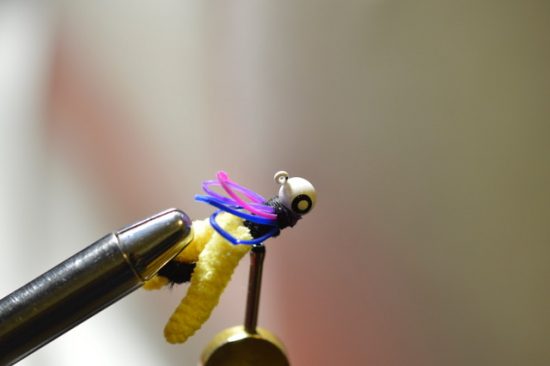
Once the mop is attached, wrap your thread forward again until you are above the bait keeper on the hook shaft (photo #5) and pick out three or four of the small hair bands.
You can use as many or as few as you wish and in any color combination. Hold them together and slip them over the jig head, all at the same time, stopping above your thread wrapping point.
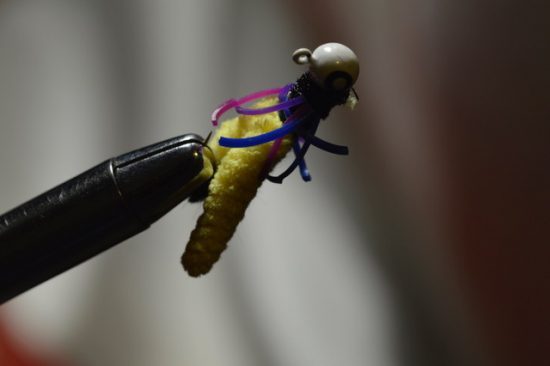
Then wrap your thread a few more times while holding the rubber bands ‘back’ and away from the head. You should have something like photo #6. To turn them into legs, just snip them with a knife or a pair of scissors, somewhere in the middle.
Continue wrapping your thread forward again until you reach the bottom of the jig head and cinch it off underneath. The easiest cinch knot is to wrap the thread around your index finger twice, somewhere between your bobbin and your jig and then slip that loop over the jig head. Do that a couple of times and then cut your thread. You can now put a drop of superglue on the cinch knot and around the threads under the jig head, being sure to spread it over your cinch knots.
That’s it, you’re done! The more of these you do, the easier it gets. You’ll most likely become bored and start thinking of your own designs and your own colors. You can tie them with one nodule, as they do in fly-fishing, but keep in mind that your presentation will be upside down in the water since the jig eye is on top of the head. This is why I came up with the two-nodule design. The hook is cradled perfectly between each nodule and very well hidden. Also, with one nodule there are occasions when a fish can target the mop material and miss the hook because of the nodule’s tendency to move away from the hook shank when it’s in the water. This solves that problem as well.
You could also tie mop jigs on plain hooks and use split shot to control the drop speed. I would use only one nodule for these ‘shallow water’ versions. To fish the mop jig, do so as if they were any other jig in your tackle bag. The best news is that they are so cheap to make, you won’t be tempted to dive in and retrieve one from a snag unless it happens to be your last one. My personal preference is the yellow mop on a black body, which seems to work well in both clear and stained water. You can tie different colors though and you are only limited by your own imagination.
If this article has done nothing else except to make you think of your own possible creations and ideas then it was a success. I highly recommend that you play around with this mop material though and try to find a way to incorporate it into your tackle. It truly is the most accidental fishing breakthrough that I’ve ever seen in my lifetime. You’d best hurry and start tying these before some tackle company figures out that they’re more effective than most of the stuff on the shelves and the prices go through the roof for this miracle fabric!